About this project
This project started as a place to publish finished astrophotography images, but it has grown into a practical learning notebook for the entire craft. Instead of showing only final images, each capture includes the context that usually gets lost: how the target was chosen, how the mount was tuned, how guiding behaved during the session, and what decisions were made in processing. The goal is that a beginner can read one page and understand what to do on their next clear night, while an experienced imager can compare workflow details and refine their own process.
Every image on this site is shared under a Creative Commons license, and that licensing is intentionally visible across the experience. Clear licensing keeps educational reuse simple for clubs, classrooms, and hobby communities who want to discuss techniques using real capture examples.
A complete deep-sky imaging narrative
A successful astrophotography result is almost never the product of one setting or one piece of hardware. It is the cumulative result of many small decisions made in sequence: careful setup before dark, realistic target planning, disciplined acquisition, and restrained processing. The visual diagrams below summarize this journey and the relationships between gear components so you can orient yourself quickly before diving into details.
How to set up for repeatable results
Begin with mechanical stability before thinking about exposure settings. Put your tripod on firm ground, level the head, and make sure every leg clamp is tight. After the telescope and camera train are attached, balance both RA and DEC so the mount is not fighting gravity on either axis. Good cable routing matters more than many people expect: a single snag can imitate periodic error and ruin otherwise excellent guiding.
Polar alignment should be treated as a quality gate. If your alignment is poor, every downstream decision becomes harder. Once aligned, perform focus with either a Bahtinov mask or autofocus routine, then re-check focus whenever temperature changes noticeably. These habits are not glamorous, but they are what make multi-hour integrations consistent.
Planning and acquisition in plain language
Choose targets that will spend meaningful time high above the horizon. A dim nebula at a low altitude can look bright in planning software but still produce weak signal through heavy atmosphere. Match your focal length to the target scale, then decide whether the night favors narrowband work (moonlit conditions) or broadband color (darker skies). When framing is locked in, save it as a reusable template so your next session can add cleanly to the same project.
During capture, think in terms of consistency rather than hero exposures. Use a sub-exposure length that keeps stars controlled and the histogram safely away from clipping, guide calmly, and dither every few frames. Calibration frames are not optional overhead; they are part of the signal chain. Darks, flats, and bias (or dark flats) make the final integration cleaner and reduce time spent fighting artifacts later.
Interpreting guiding without guesswork
Guiding RMS is easiest to interpret relative to image scale. If your total RMS is lower than your arcseconds-per-pixel value, your stars are often in a healthy range for deep-sky work. As a rough benchmark, 0.30" to 0.60" is excellent, 0.60" to 0.90" is very good, and values above 1.50" usually indicate something that should be corrected, such as polar alignment drift, balance bias, backlash, wind, or cable drag. Seeing still sets the upper limit, so avoid over-tuning for temporary atmospheric spikes.
Processing as a sequence of small, reversible decisions
Start by calibrating and integrating your lights into a clean master. Remove gradients before major stretching so background correction does not fight an already nonlinear image. Perform color calibration with a reference method, then apply noise reduction and deconvolution with masks so details remain natural. Stretch gradually, checking star cores and background neutrality at each step. Final polish should focus on balance and readability, not maximal contrast. A restrained finish usually ages better than an aggressively sharpened one.
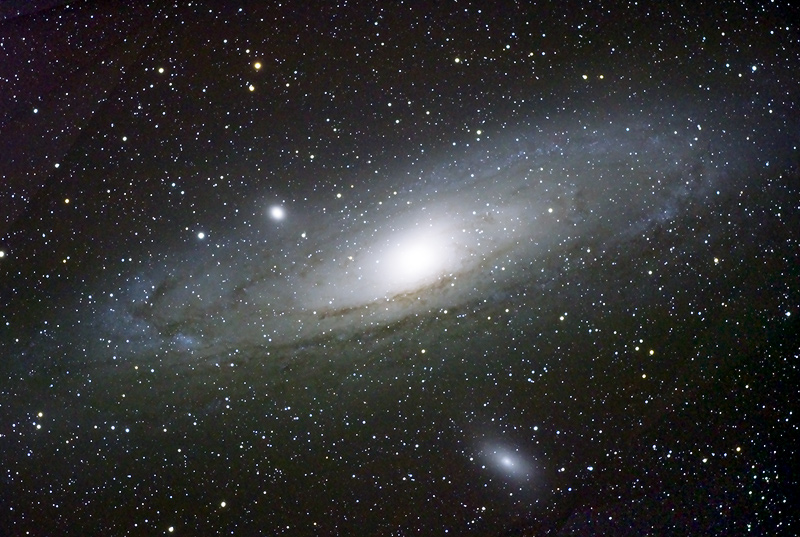
Example sky references and inspiration
These public-domain astronomy images are included here as visual references for composition, star color contrast, and scale. They are not local captures, but they are helpful for understanding what different classes of targets can look like when processed with care.

Recommended references for deeper study
If you want to go deeper, the PHD2, N.I.N.A., Siril, and PixInsight documentation sets remain some of the most practical sources for troubleshooting and workflow refinement. For planning, field-of-view calculators and seeing forecasts are essential companions to clear-sky reports.
PHD2 Guiding · N.I.N.A. · Siril · PixInsight · Astronomy Tools FOV Calculator · Clear Outside · Meteoblue Seeing
Astrophotography learning and tool directory
The resource list below is organized by purpose so you can quickly jump to practical beginner guides, active communities, planning tools, capture/processing software, and inspiration platforms. Every link opens in a new tab.
General guides and tutorials
- Beginner Astrophotography: A Complete Guide Comprehensive beginner-to-intermediate guide covering gear, planning, light pollution, tracking and processing.
- Astrophotography Resources (AstroBackyard) Curated list of software tools, apps and general resources to support imaging workflows.
- Astrophotography Guide for Beginners (Reddit) Community-driven advice oriented around deep sky imaging fundamentals.
Forums and community sites
- Cloudy Nights One of the most comprehensive online communities for techniques, equipment decisions, processing, and troubleshooting.
- Stargazers Lounge Active UK-centric community for practical help, shared experiences and inspiration.
Planning and sky simulation tools
- Stellarium Free open-source planetarium software for visualizing the sky, planning sessions, and identifying targets.
- Telescopius Online planner with target lists, visibility charts, and search features tailored for astrophotography.
- Astronomy-Tools.com Calculators for field of view planning and telescope/camera match-ups.
Software for capture, processing and analysis
Planning and auxiliary tools
- DeepSkyPlanner Community-referenced software for creating multi-target observation lists and session plans.
- Light Pollution Map Global satellite-based dark-sky maps for selecting imaging locations.
- Astrometry.net Free plate-solving service to identify celestial coordinates in your images.
Image hosting and inspiration
- AstroBin Dedicated astrophotography image platform with tagging, exposure metadata, and community feedback.
Journal and broader astronomy coverage
- Sky & Telescope Long-standing astronomy magazine with observing guides, gear reviews and imaging features.
Apps and mobile tools
- Astrophotography Apps Guide (Picastro) Curated list of mobile tools useful for field planning, imaging, and reference.
Supplementary resource index
- Astro Sites Comprehensive astronomy and astrophotography link directory assembled by enthusiasts.
Comprehensive astrophotography guide
This guide is written as a practical, start-to-finish workflow you can follow in the field and then refine in post-processing. Equipment examples use the rig values already used throughout this project: Esprit 120 telescope, EQ6-R Pro mount, ASI2600MM camera, ZWO 7x2" EFW, and Ha/OIII/SII narrowband filters.
1) Telescope setup and site preparation
- Tripod and mount leveling: Set up the tripod on stable ground, spread legs fully, and level the mount base before adding payload. Good mechanical alignment here reduces later correction load.
- Balance both axes: With the Esprit 120 + camera + filter wheel installed, balance RA and DEC carefully in the exact imaging configuration (all cables attached). Slight east-heavy RA bias can help some mounts maintain gear mesh.
- Cable management: Route power/USB/dew-heater cables so the mount can slew meridian-to-horizon without snagging. Leave smooth service loops and test full-range slews in daylight.
- Polar alignment: Use your preferred method (polar scope, software-assisted plate-solving, or dedicated polar-align routines). For long focal-length work, aim for polar error under 1-2 arcminutes, and ideally below 1 arcminute when practical.
- Focus and thermal stability: Reach rough focus at dusk, then fine-focus once stars are visible. Recheck focus as temperature drops, especially on refractors where focus drift is common.
2) Image planning (before darkness and during the night)
- Choose target by altitude and season: Prioritize objects that culminate high to reduce atmospheric distortion and improve signal quality.
- Frame planning: Use a field-of-view calculator with your Esprit 120 + ASI2600MM combination to preview object scale and orientation before session start.
- Moon and sky condition strategy: Shoot narrowband (Ha/OIII/SII) in bright Moon phases and reserve broadband or RGB-heavy work for darker windows.
- Exposure strategy: Plan total integration first (for example 6-20+ hours depending on target), then divide into subexposures suitable for your sky brightness, guiding quality, and mount behavior.
- Sequence planning: Prepare a capture sequence that includes autofocus triggers, dithering cadence, filter changes, meridian flip handling, and calibration frames.
3) Image acquisition (capture night workflow)
- Plate-solve and center: Slew, solve, center, and rotate framing to match your plan.
- Guiding setup and expected accuracy:
- Excellent: ~0.3"-0.6" total RMS (rare, premium seeing/mechanics).
- Very good: ~0.6"-0.9" total RMS (commonly enough for small stars at moderate focal lengths).
- Usable: ~0.9"-1.4" total RMS (often acceptable depending on image scale and seeing).
- Troubleshooting zone: >1.4" RMS sustained; inspect balance, cable drag, backlash, aggressiveness, exposure time, and wind shake.
- Dither between frames: Dither every 1-3 subframes to suppress fixed-pattern noise and walking noise in stacked integrations.
- Monitor data quality live: Watch FWHM/HFR trends, star eccentricity, histogram placement, and cloud/smoke intrusion. Abort poor subs early to protect total integration efficiency.
- Capture calibration data: Acquire darks, flats, and dark-flats/bias according to your camera workflow. Keep flats matched to optical train state (focus, rotation, filter, reducer spacing).
4) Processing workflow (from raw frames to final image)
- Pre-processing and calibration: Calibrate lights with dark/flat data, perform registration, quality-weighted integration, and rejection of poor frames.
- Background and gradient correction: Remove vignetting remnants and sky gradients before aggressive stretching.
- Linear-stage noise management: Apply careful denoise while preserving structure (especially in faint nebula dust).
- Channel combination: For your Ha/OIII/SII workflow, combine channels (SHO, HOO, or custom blends), then neutralize stars/background before non-linear stretch.
- Non-linear stretch and contrast shaping: Stretch gradually to preserve dynamic range and avoid clipping bright cores.
- Star control and color refinement: Use star reduction or star-separate workflows only as needed; maintain natural star sizes and color variety.
- Final polish: Micro-contrast, saturation tuning, local structure enhancement, crop/rotation cleanup, and export master + web-ready versions.
5) Quality checklist before publishing
- Stars are round across most of the field (no strong tilt or corner elongation).
- Background is neutral/smooth without blotchy chroma noise.
- No clipped black point and no blown-out bright cores unless intentionally styled.
- Metadata is complete (target, date, exposure totals, telescope, mount, camera, filters, processing notes).